Making Multiple Appointment Calendars With Easy Appointment on Wordpress
Themeisle content is free. When you purchase through referral links on our site, we earn a commission. Learn More
Want to let your visitors book appointments through WordPress? Sure, you could do it manually through your contact form, but why not set up an automated system to save yourself some time? With an appointment booking calendar, visitors can easily check availability and schedule an appointment all by themselves.
In this post, I'll give you a detailed step-by-step guide how to allow your website visitors to book an appointment through WordPress using a free plugin called Easy Appointments.
Our tool for the job: Easy Appointments
While there are several different plugins that can help you let your visitors book appointments through WordPress, I chose Easy Appointments for this tutorial because it's, first off, free.
Who doesn't like free?
But beyond its price tag, I also like Easy Appointments because it's flexible in terms of the types of bookings that it can accept. You can use it for different things like:
- Scheduling personal appointments
- Handling appointments across multiple locations.
- Allowing people to book appointments for different service providers.
And you'll be able to easily see all of your scheduled appointments directly inside your WordPress dashboard.
And best of all, it's regularly updated and has good reviews.
How to let people book appointments through WordPress
Okay, now I'll show you everything you need to do to get it set up and allow your visitors or clients to book appointments through WordPress.
Step 1: Install and activate Easy Appointments
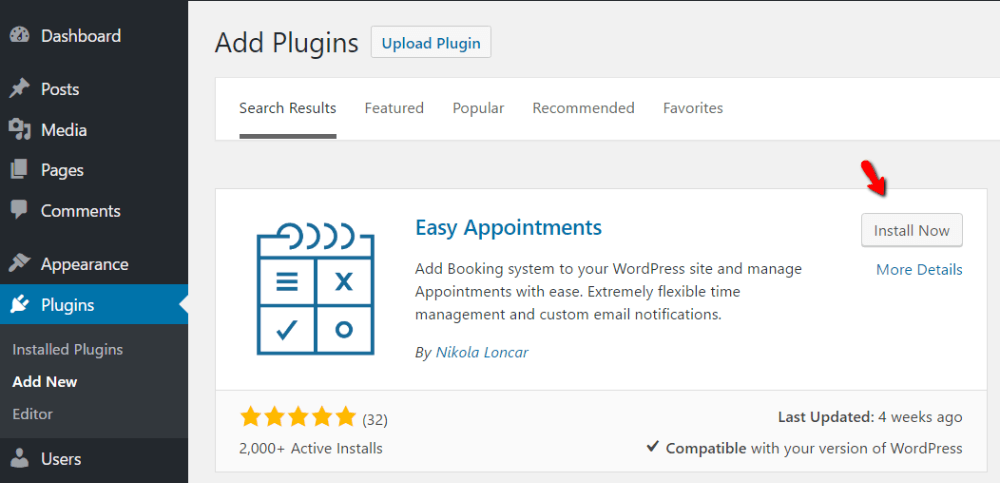
Get started by installing and activating Easy Appointments. It's free and listed at WordPress.org, so you can install it directly from your WordPress dashboard (here's how in case you need help).
Make sure you install the right plugin because there are a few different plugins with similar names:
Step 2: Add your locations
Once you activate Easy Appointments, you should see a new Easy Appointments tab in your dashboard sidebar.
Head there and go to the Settings link. The first thing to set up is your locations. To add one, click on + Add New Location:
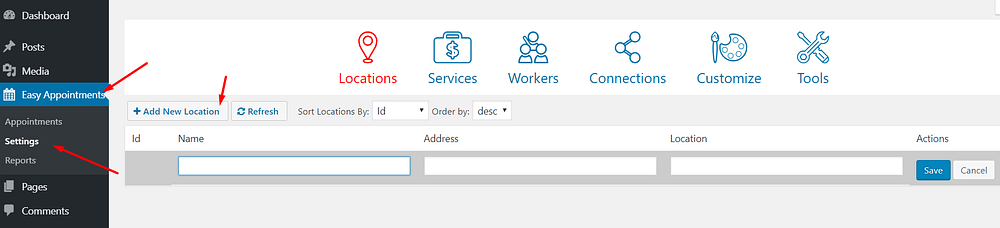
Just enter a Name, Address, and Location. You don't need to include all of the fields – so if you're booking appointments for, say, digital meetings, you don't need to add a business address or location.
You can add as many locations as needed. So if you want to accept bookings at different physical locations, add each location separately.
Step 3: Choose what services people can book
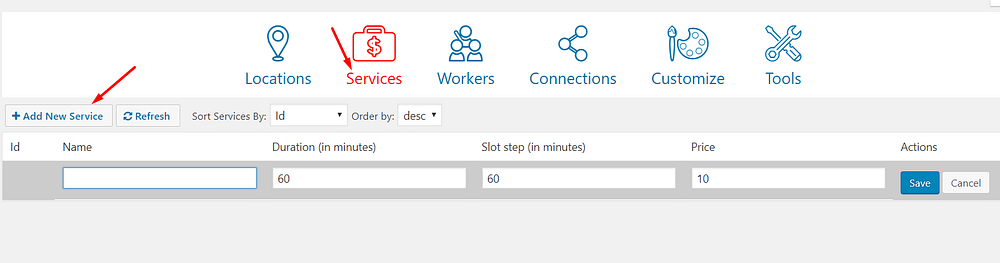
On the Services tab, you can click + Add New Service to spell out which different services people can book as well as how long those services last for.
Again, you don't need to enter all the fields, so you can leave Price blank if you don't want to specify a price. For example, to set up a service for a free one-hour consult, you would enter something like this (notice the blank price field):
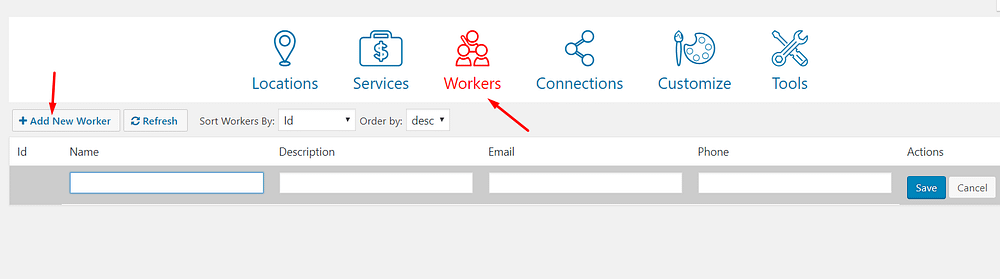
Step 4: Choose how many workers you have
Next up, head to Workers and enter the name and contact information for each worker you want to allow visitors to book.
If you're the only one accepting appointments, all you need to do is add an entry for yourself. Otherwise, you can include each available worker in a separate entry:
Step 5: Set your connections
The Connections tab is where you actually link up your locations, services, and workers. For example, you can specify that:
- Worker A offers Service B at Location C on X days of the week.
If you're the only one accepting appointments, it's pretty trivial to set up. If you have multiple workers / locations / services, you'll need to be careful when configuring everything, though.
To help you grasp how everything connects, here's an example of a connection where I, Colin Newcomer, offer one-hour consults at a digital location from 9 am to 5 pm on Monday to Friday:

Step 6: Configure emails and forms
Last configuration step! On the Customize tab, you can configure the emails and forms used for your booking system.
You can specify emails for Pending, Reservation Info, Canceled,Confirmed and Admin. Set each email text in its corresponding tab. And make sure to utilize the tags at the top of the email editor box. They allow you to insert dynamic content into your emails.
For example, #worker_name# will be automatically replaced by the actual name of the worker:
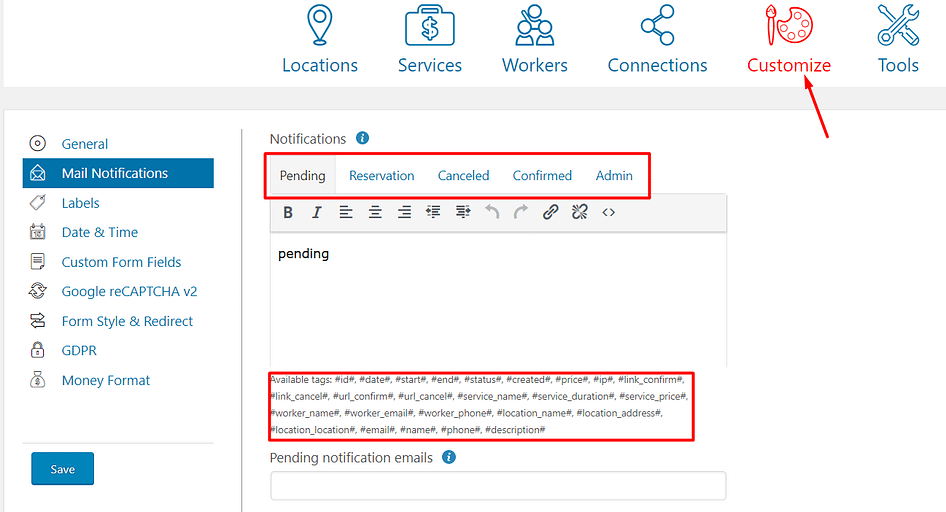
Also, make sure to configure the emails' subjects and "from emails" at the bottom of the email editor box.
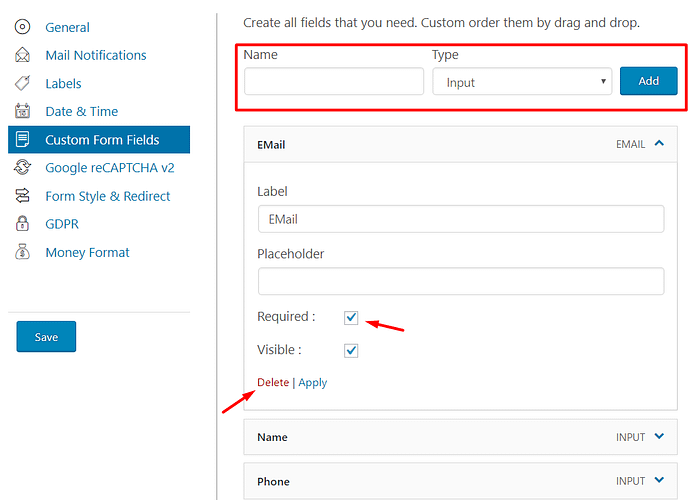
A bit further down the page, you can add Custom form fields if needed. You can also delete fields and choose whether or not each field is required:
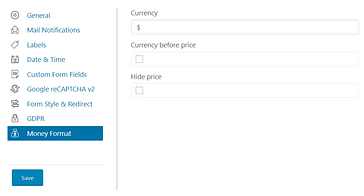
And finally, at the end of the Customize tab, you can choose a different currency for your appointment prices or, if you don't want to set prices, completely turn off the price feature:
Step 7: Display your appointment booking form on the front-end
Okay, now your appointment booking form is totally configured. But you still need to add it your site so people can actually use it!
To do that, you can use a simple shortcode in any post or page where you want your booking form to appear.
I'll give you two shortcodes:
- For a basic one-column form, just use:
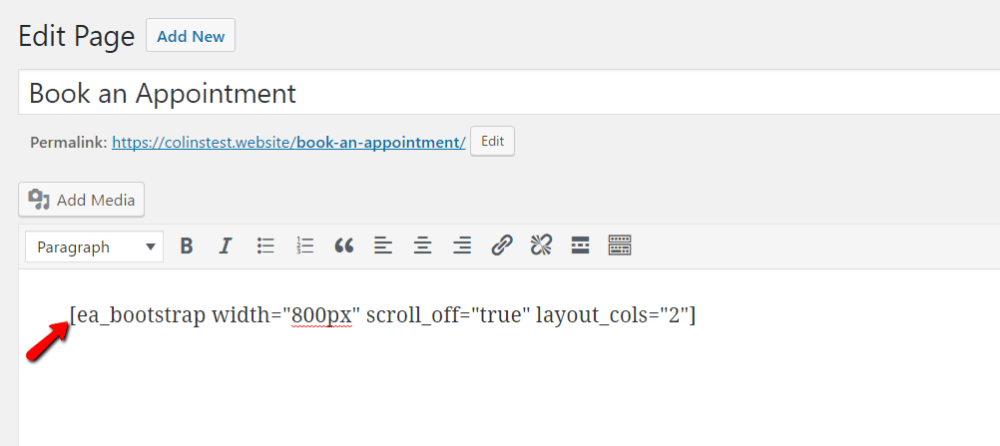
[ea_bootstrap] - To create a two-column form, which I think looks much better, use:
[ea_bootstrap width="800px" scroll_off="true" layout_cols="2"]
For example, to add a two-column form on a page called Book an Appointment, you'd create a new page with that name and add the shortcode to the WordPress Editor:
Then, once you publish the page, you should see a booking form like this:
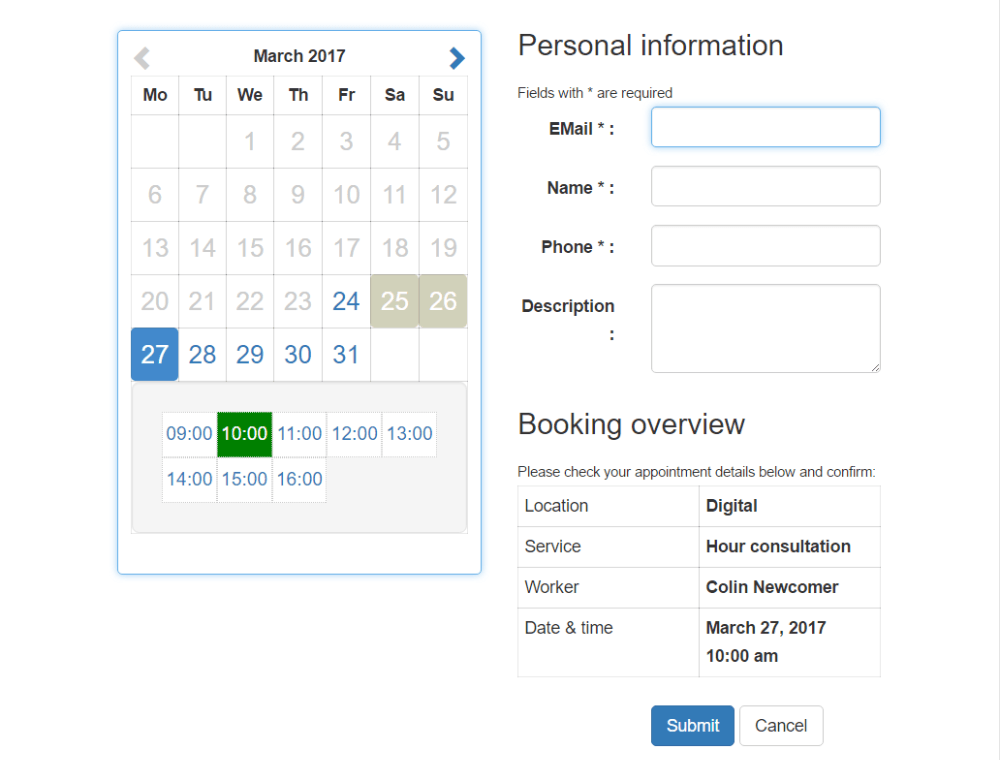
Note how the weekends are greyed out (unavailable) and your visitor gets a nice Booking overview to review the information before submitting their booking.
How can you tell when someone books an appointment?
Whenever you get a new appointment, three things will happen. I'll start with the two that don't require any action on your part:
- You'll get a notification email.
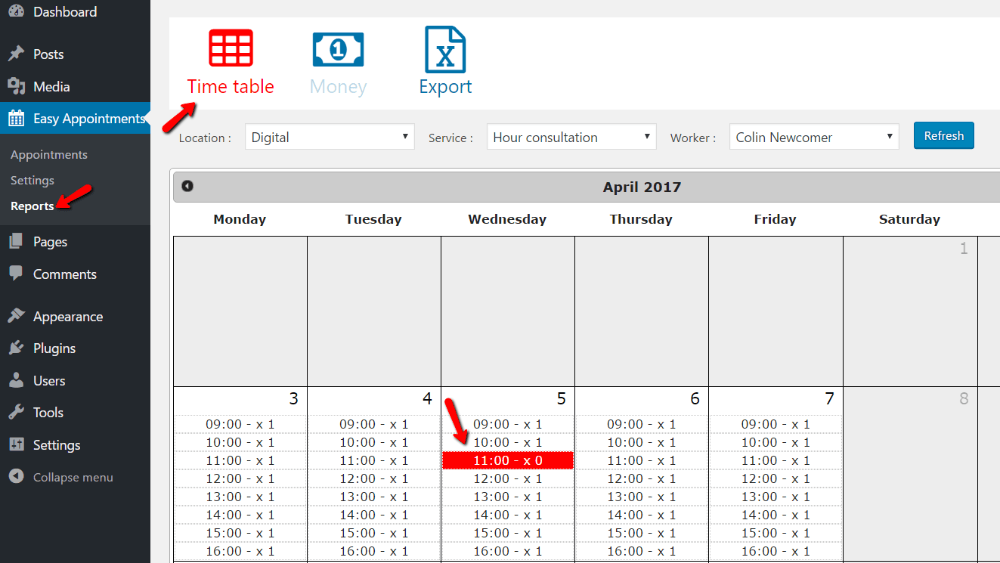
- The appointment will be added to the specified worker's time table, which is accessible by going to Reports → Time table. This gives a broad overview of availability:
The third thing is something you will need to take action on. In the Appointments option, you'll see all your bookings for the specified time period.
By default, all new bookings are only saved as Pending. To make them permanent, you need to click on the appointment, click Edit, and change its status to Confirmed. The person who booked the appointment will then get an email telling them their appointment is confirmed:

And that's all you need to do! Now, your visitors can easily book appointments through WordPress without any back-and-forth about timeslots and availability.
Free guide
5 Essential Tips to Speed Up
Your WordPress Site
Reduce your loading time by even 50-80%
just by following simple tips.
Download free guide
Source: https://themeisle.com/blog/book-appointments-through-wordpress/
Post a Comment for "Making Multiple Appointment Calendars With Easy Appointment on Wordpress"